IPU Model Recognition Program Description
1. Function Introduction
This demo mainly demonstrates how to insert the IPU model recognition part into the entire pipeline from sensor to RTSP. In this pipeline, IPU algorithm library functions and models are used for face detection, and the detection results are displayed in real-time.
  +---------+      +---------+      +---------+                     +--------+     +--------+
  |   VIF   | ---> |   ISP   | ---> |   SCL   | ---port0:Source---> |  VENC  | --> |  RTSP  |
  +---------+      +---------+      +----+----+                     +--------+     +--------+
                                         |                               ^
                                         |                               |
                                         |                               |
                                         |                               |
                                         |         +--------+       +----+---+
                                  port1:Scaled---> |  DET   | ----> |  RGN   |
                                                   +--------+       +--------+
- Integrate the DLA det function into the pipeline. SCL port0 and port1 respectively send the original resolution buffer info from VIF and the buffer info scaled by SCL to the resolution size supported by the IPU network model to DET for processing. After obtaining the target coordinate information, use the frame function of RGN to attach to VENC to draw detection boxes.
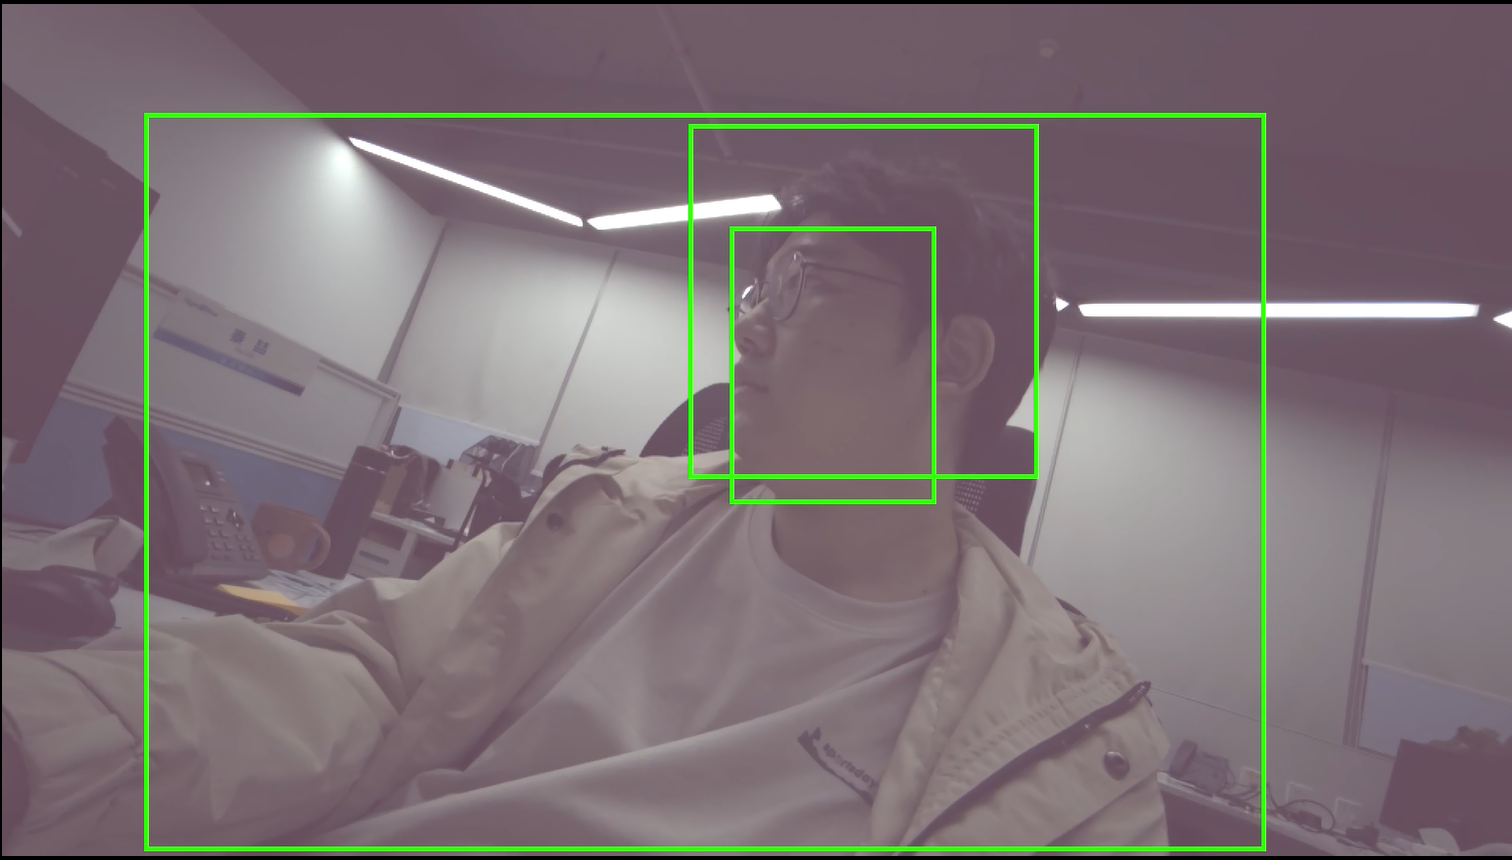
- According to different specified detection model files, the demo can detect targets such as humans and pets, pedestrians, humans-non-motor vehicles-cars, etc., and mark them with green boxes.
- When typing character "q", the process exits.
2. Compilation Environment Description
Note
Generally, the board is already packaged with the corresponding program by default, so program compilation is not necessary. You can directly find prog_dla_detection_demo in the board's /customer/sample_code/bin folder. If you cannot find the file or have the need to modify the program yourself, you can refer to the following steps.
-
If you cannot find
prog_dla_detection_demo, you can check whetherAPP_REL_PREFIX:= binis included insdk/verify/sample_code/source/iford/dla/detection_demo/detection_demo.mk. If not, you can add it to detection_demo.mk, so that it will be packaged into the image when compiling the project; -
In the project path, select defconfig for full package compilation according to the board (nand/nor, DDR model, etc.)
For example, for Comake PI D2 model board, use the following defconfig. For other board models, refer to the user manual for details.
ipc_iford.emmc.glibc-11.1.0-ext4fs.ssc029d.256.bga8_lpddr4x_d2_full_defconfigExecute the following commands in the project directory for compilation;
make ipc_iford.emmc.glibc-11.1.0-ext4fs.ssc029d.256.bga8_lpddr4x_d2_full_defconfigmake clean && make image -j16 -
If there is a need to modify the program, you can cd to the
sdk/verify/sample_codedirectory and executemake clean && make source/source/iford/dla/detection_demofor compilation; -
Obtain the executable file at
sample_code/out/arm/app/prog_dla_detection_demo; -
Place the executable file
prog_dla_detection_demoon the board's/customer/sample_code/binpath and modify permissions to 777.
3. Runtime Environment Description
The Sensor type used in the system is determined at compile time. You can check the CONFIG_SENSOR_TYPE parameter of alkaid deconfig to confirm
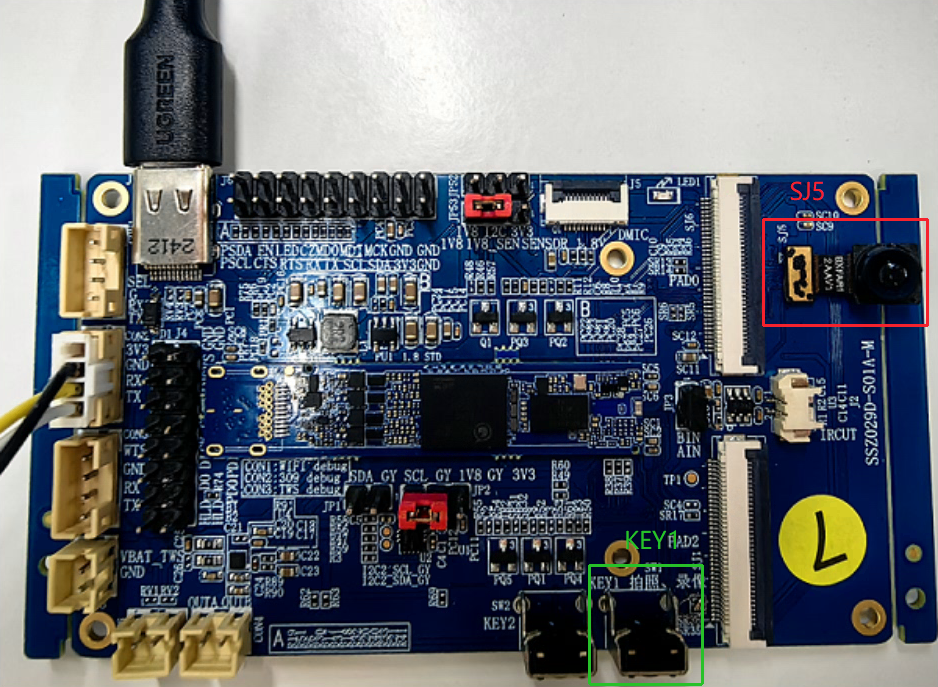
Connect the imx681 camera to the SJ5 interface.
The system has configured the sensor driver by default: imx681_mipi.ko is loaded by default.
4. Resource File Description
- File location:
project/board/iford/dla_file/ipu_net/det/ - Package location: Automatically packaged to the board's
/config/dla/detdirectory after full package compilation - Usage: Specify the model path through the
modelparameter when the program runs
If you find that the model is not automatically packaged to the board, you can also copy it yourself.
5. Running Instructions
-
Place the executable file
prog_dla_detection_demoon the board and modify permissions to 777 -
Use sensor as imx681, computer and development board are connected and powered via USB.
-
Run commands such as
/customer/sample_code/bin/resource/setup_rndis.shto enable the development board to connect to the computer via USB -
Run commands such as
./prog_dla_detection_demo index 3 model /config/dla/spdy48.imgto enter target detection -
index: Select the resolution parameter of the camera, provided by the camera driver. The corresponding relationships for available resolutions are as follows:index 1 # 3840x2160@21fps index 2 # 2016x1512@30fps index 3 # 1920x1080@30fps index 4 # 3264x2448@30fps index 6 # 3840x2160@30fps -
model: ipu network model file path. Automatically packaged to the board's/config/dla/det/detdirectory after full package compilation. When running the demo, use themodelparameter to specify the path. For detailed specifications of the model, seealkaid/project/board/iford/dla_file/ipu_net/README.txtand doc documentation.
6. Running Results Description
-
Effect viewing
After prog_dla_detection_demo runs up, you can choose to use video playing software such as vlc media player or potplayer to play by opening the link
rtsp://192.168.7.2/6600. After successful playback, you can see the sensor画面.Run the player on the PC terminal. Detected human heads, etc., will be marked with boxes, and multiple detection objects can be boxed at the same time.